
Like this article?
Go on, give it a kudu!
Published on July 20 2015
Written by:
Morgan
2865 views
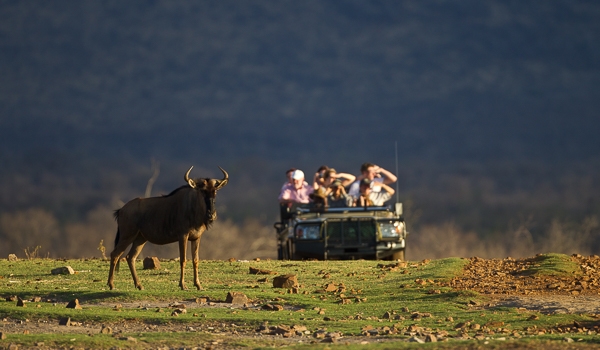
Snapping great photos, both for personal memories and for sharing with friends and family, is a top priority for many safari goers. Unfortunately, good wildlife photography requires specialized equipment and a little more knowhow than the average selfie.
While point-and-shoot cameras and the new mirrorless wonders are great for travel shots, most wildlife encounters will require the longer lenses and the fast and accurate focusing power of a DSLR. Here are some tips to consider before you choose a camera and head out on safari.
1) Get the right gear
You need the appropriate equipment to bag your best wildlife shots. Despite improvements in the compact camera market, DSLRs are still king when it comes to top-class wildlife photography. Generally, the lenses are more important than the camera, and if you’ve invested in good glass, you can get fantastic results with even an entry level DSLR.
The best wildlife lenses are fast, heavy and expensive. If you want the best, get the fastest lenses possible—those with the widest maximum aperture, often f2.8, that will let in the most light and allow you to use faster shutter to avoid blurry photographs. Image stabilization is also a great feature for wildlife work.
In terms of focal length, a good 70-200mm with some wider lenses to capture people and landscapes will cover most situations. You can add a “converter” to lengthen the reach of your 70-200mm or choose a longer zoom (for example a 100-400mm) for those situations when you need more reach. Longer lenses are great for birds or shy animals that keep their distance. The ultimate lenses for these purposes are long primes such as 300mm to 500mm fixed lenses, but these huge expensive, and unwieldy behemoths are only for those truly committed to their craft.
2) Get to know your equipment—no shortcuts!
Having the right equipment won’t help you get great photos unless you put in the time to learn how to use it. “Automatic” settings on your DSLR will likely leave you with shots no better than you would have gotten on a point-and-shoot. It is essential to understand the basics of photography—the interplay between shutter speed, aperture and ISO and how these settings affect your images. Grab a book on the topic, or better yet, enroll in a photography course to learn your system. Don’t worry! It’s not as complicated as the instruction manual makes it out to be.
3) Specialty camera setting: Focus points
Once you’ve got the basics of exposure down, it’s time to experiment with specialty settings. For wildlife photography, there are three basic tweaks to your camera settings that will put you way ahead of the curve in terms of achieving technical perfection—correct exposure and focus. First is choosing a focus point. Modern DSLRs have complicated algorithms for predicting which of the camera’s multiple focusing points is the one you want to use. In my experience, I prefer to do the work myself. I select just one focus point, usually the center point, depending on the situation. When I focus the camera and then recompose the shot, I know that the image will be sharply focused on the point I chose, such as a lion’s eye, rather than on some random grass or tree in the background. It may not be as high tech, but it saves endless frustration at mis-focused shots.
4) Specialty camera setting: Exposure mode
The second tweak is to choose the exposure mode. Don’t think that full manual, by virtue of being the most hardcore, is the best answer. Most pro wildlife photographers consider aperture priority (or “Av” mode), where you set the aperture and the camera chooses the appropriate shutter speed, to be the best way to creatively keep up with the fast pace of wildlife photography. Small tweaks can then be accomplished through exposure compensation.
5) Specialty camera setting: Back button focus
The third tweak is to the focusing system. Cameras are generally set to focus when you press the shutter half way down, and take the photo when you complete the full press. Focus mode can be toggled between single shot, where the camera focuses just once, and continuous, where as long as you hold the button half way down, the camera continues to focus. Unfortunately, there are situations when you want it both ways, but changing between focus options is awkward and slow. Many wildlife pros have discovered that they can have it both ways by using their camera’s custom menu to move the focus button to a button on the back of their camera. This custom option decouples the shutter button from focusing. You can then press the back button just once, for example if you want to focus on a lion’s eye and then recompose the shot and press the shutter button to capture it without affecting your carefully set focus. Alternatively, if the lion starts charging towards you, you can hold down the back button to focus continuously while taking shots with the shutter button. It takes some getting used to, but it will definitely improve the speed at which you can shoot different situations and your percentage of correctly focuses shots.
Morgan Trimble www.morgantrimble.com

Has been on: 20 safaris
I'm an adventurous traveler and like to get off the beaten track. I'm a writer and photographer, and I enjoy a wide range of topics, especially travel, adventure, and nature. See more of my work at www.morgantrimble.com
© Your African Safari Ltd, All rights reserved.
Your African Safari is a safari-planning and safari review site. It was created to help support a healthy African wildlife population. All reviews are vetted before being approved and only ethical tours are published
The elephant kingdom: Where giants gather
Published on May 06 2026
By: yourafricansafari.com
Using charter flights on your next safari
Published on December 22 2025
By: yourafricansafari.com
Garamba National Park—an anchor of hope in the Democratic Republic of Congo
Published on January 09 2025
By: R.W.
